TubeTK/Documentation/InteractivePDFSegmenter: Difference between revisions
From KitwarePublic
< TubeTK | Documentation
Jump to navigationJump to search
No edit summary |
No edit summary |
||
| Line 1: | Line 1: | ||
== Documentation == | == Documentation == | ||
TODO: | === Overview === | ||
=== Parameters === | |||
* '''Input Volume 1''': The image to be segmented | |||
* '''Input Volumes 2 and 3 (optional)''': TODO | |||
* '''Output Volume''': The segmentation results | |||
* '''Label Map''': A rough initial segmentation provided as input to the algorithm | |||
* '''Void Id''': Value that specifies nothing in the label map | |||
* '''Erosion Radius''': TODO | |||
* '''Hole Fill Iterations''': TODO | |||
* '''False Positive Ratio''': TODO | |||
* '''Probability Smoothing Standard Deviations''': TODO | |||
* '''Draft Mode''': TODO | |||
* '''Reclassify Object Mask''': Whether or not to TODO | |||
* '''Reclassify Not Object Mask''': Whether or not to TODO | |||
== Tutorial == | == Tutorial == | ||
| Line 35: | Line 49: | ||
#* [[File:InteractivePDFSegmenterTutorial_step5b.png|800px]] | #* [[File:InteractivePDFSegmenterTutorial_step5b.png|800px]] | ||
#* Void Id: 0 | #* Void Id: 0 | ||
# '''Specify the segmentation parameters''' | # '''Specify the segmentation parameters''' | ||
#* The goal segmentation buttons provide example parameters depending on whether the shapes of the expected segmentations are jagged, smooth or intermediate | #* The goal segmentation buttons provide example parameters depending on whether the shapes of the expected segmentations are jagged, smooth or intermediate | ||
Revision as of 16:39, 7 January 2011
Documentation
Overview
Parameters
- Input Volume 1: The image to be segmented
- Input Volumes 2 and 3 (optional): TODO
- Output Volume: The segmentation results
- Label Map: A rough initial segmentation provided as input to the algorithm
- Void Id: Value that specifies nothing in the label map
- Erosion Radius: TODO
- Hole Fill Iterations: TODO
- False Positive Ratio: TODO
- Probability Smoothing Standard Deviations: TODO
- Draft Mode: TODO
- Reclassify Object Mask: Whether or not to TODO
- Reclassify Not Object Mask: Whether or not to TODO
Tutorial
Tutorial Data
- The 2D brain image used in this example is distributed as part of Slicer4, and is located in Slicer4/Testing/Data/Input/brainSliceDOUBLE.mha
- In this example, we will attempt to segment gray matter, white matter and cerebrospinal fluid (CSF)
Tutorial Steps
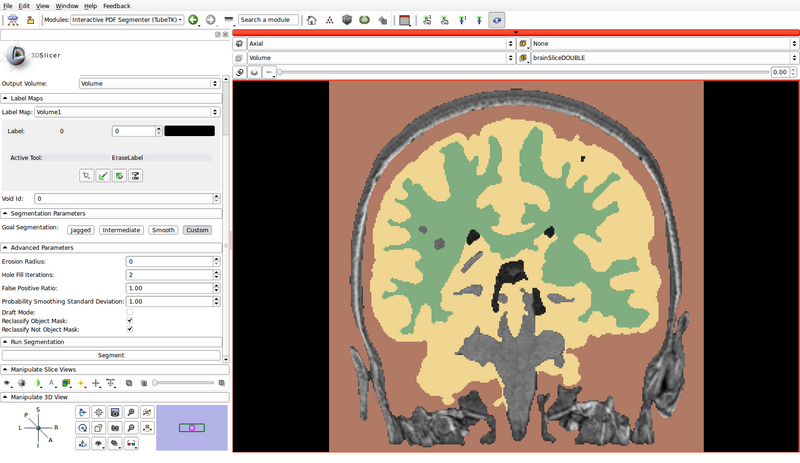
- Load brainSliceDOUBLE.mha:
- File -> Add Volume
- Open the Interactive PDF Segmenter module
- Set the input and output volumes
- Input Volume 1: brainSliceDOUBLE
- Input Volume 2 (optional): None
- Input Volume 3 (optional): None
- Output Volume: Create new volume
- Creates a new volume called "Volume": this will hold the final segmentation
- Set the view layout to "Red slice only"
- Create the label map roughly outlining the structures to be segmented and the background
- Label Map: Create new volume
- Creates a new volume called "Volume1": this will hold the input label map
- A small version of Slicer's Editor module is embedded into the Interactive PDF Segmenter
- Create a label map roughly outlining the structures of interest and the background by using the paint, erase and threshold functions
- Click on the "Paint" button to begin editing
- Use a different label color for each structure of interest: choose the label by clicking the colored push button
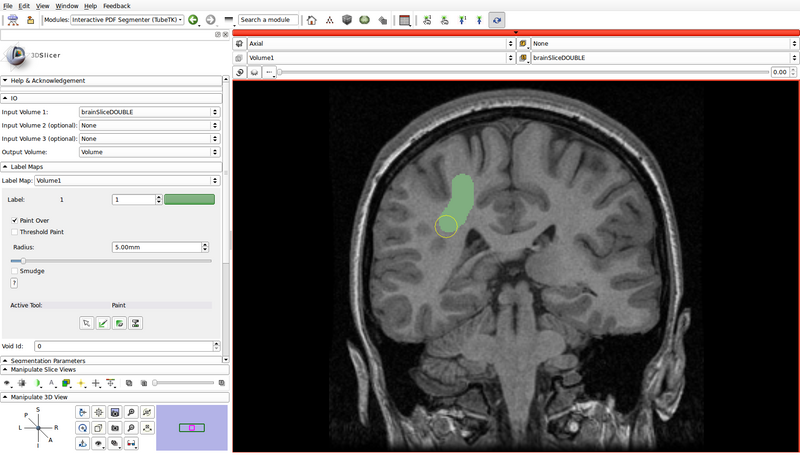
- Create a label for the background as well
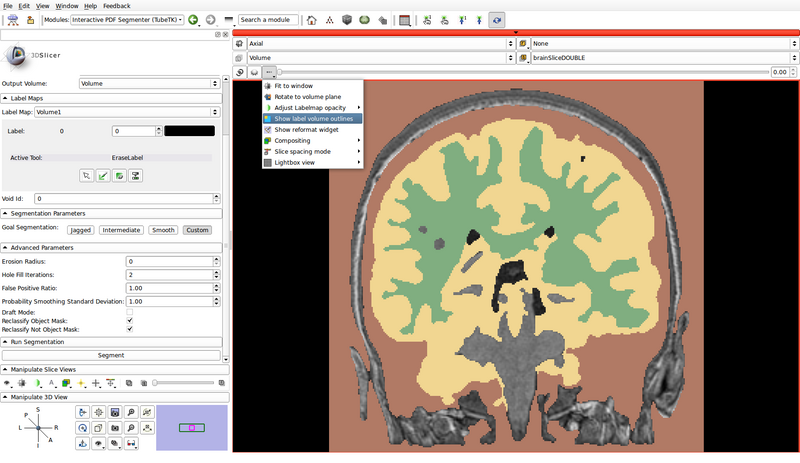
- In the following example, green represents gray matter, yellow represents white matter, and brown represents the cerebrospinal fluid (CSF):

- Void Id: 0
- Label Map: Create new volume
- Specify the segmentation parameters
- The goal segmentation buttons provide example parameters depending on whether the shapes of the expected segmentations are jagged, smooth or intermediate
- In this example, we will use custom parameters
- Erosion Radius: 0
- Hole Fill Iterations: 2
- False Positive Ratio: 1.00
- Probability Smoothing Standard Deviation: 1.00
- Draft Mode: Off
- Reclassify Object Mask: On
- Reclassify Not Object Mask: On
- Run the segmentation
- Click the "Segment" button
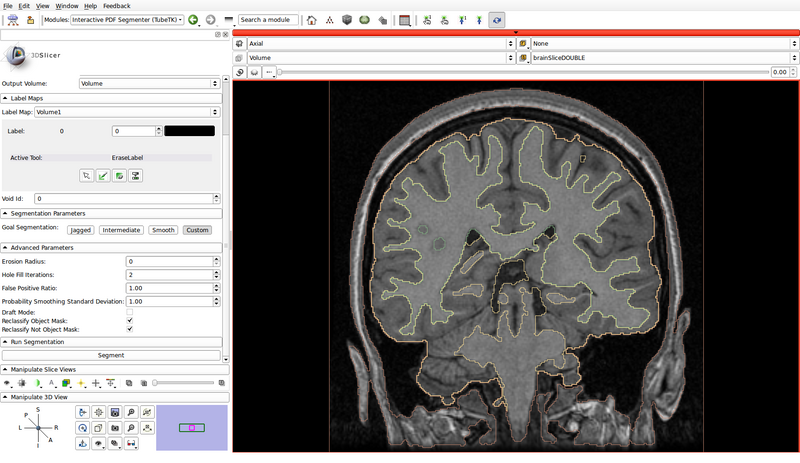
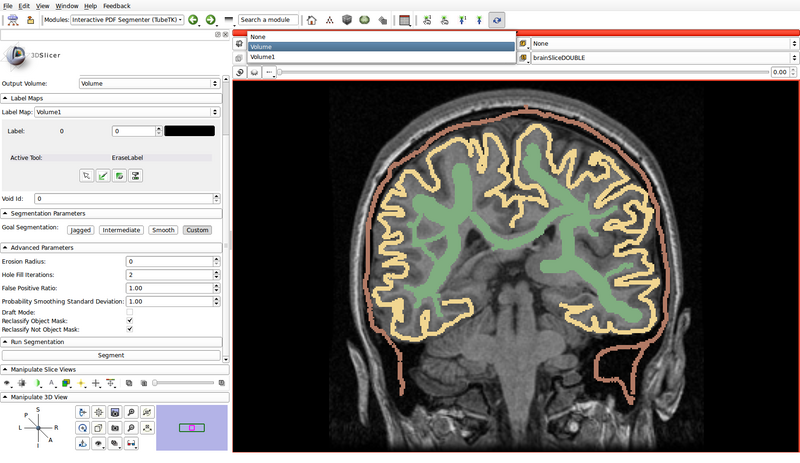
- Select "Volume" as the label map to view the results
- Pixels that do not have a label value remain un-classified
- To view the label outlines, select "Show label volume outlines"