KWWidgets/Projects/3DWidgets/Part2/Widgets/VTKW: Difference between revisions
No edit summary |
No edit summary |
||
| Line 1: | Line 1: | ||
= Installing VTK on a Windows System = | |||
[[Image:3D_Widgets_Part_2_Windows_Logo.png|100px|Windows Logo]] | |||
= | === Downloads Required === | ||
*CMake http://www.cmake.org/HTML/Download.html | |||
*MinGW http://www.mingw.org/download.shtml | |||
*WinCVS http://www.wincvs.org/download.html | |||
=== Install CMake === | |||
Follow the wizard instructions of the downloaded installation file. | |||
=== Install MinGW === | |||
Follow the wizard instructions of the downloaded installation file. | |||
=== Install WinCVS === | |||
Follow the wizard instructions of the downloaded installation file. | |||
=== Download VTK === | |||
Launch the installed WinCVS. | |||
To begin with, set the installation directory, | |||
Admin -> Preferences | |||
[[Image:3D_Widgets_Part_2_Windows_cvs0.png|300px|CVS Command 1]] | |||
Type in the desired installation directory and click “OK”. | |||
Next, we need to connect to the CVS repository. | |||
Admin->Command Line | |||
[[Image:3D_Widgets_Part_2_Windows_cvs1.png|300px|CVS Command 1]] | |||
Type in “cvs -d :pserver:anonymous@public.kitware.com:/cvsroot/VTK” login and click “OK”, respond to the demand for a password with “vtk”. | |||
Finally, we need to download the CVS version of vtk. | |||
Admin->Command Line | |||
[[Image:3D_Widgets_Part_2_Windows_cvs2.png|300px|CVS Command 2]] | |||
Type in “cvs -d :pserver:anonymous@public.kitware.com:/cvsroot/VTK checkout VTK” login and click “OK”. | |||
=== Compiling === | |||
In a command window, type | In a command window, type | ||
<pre>cmakesetup .</pre> | <pre>cmakesetup .</pre> | ||
[[Image:3D_Widgets_Part_2_Windows_cmakesetup.png|300px| | [[Image:3D_Widgets_Part_2_Windows_cmakesetup.png|300px|CMakeSetup]] | ||
<pre>cmake .</pre> | <pre>cmake .</pre> | ||
[[Image:3D_Widgets_Part_2_Windows_cmake.png|300px| | [[Image:3D_Widgets_Part_2_Windows_cmake.png|300px|CMake]] | ||
Lastly, you need to call the C++ compiler, as I used MinGW, the actual executable to call is mingw32-make.exe so I made a batch file to make it simpler 8) | Lastly, you need to call the C++ compiler, as I used MinGW, the actual executable to call is mingw32-make.exe so I made a batch file to make it simpler 8) | ||
<pre>make</pre> | <pre>make</pre> | ||
[[Image:3D_Widgets_Part_2_Windows_make.png|300px| | [[Image:3D_Widgets_Part_2_Windows_make.png|300px|Make]] | ||
Revision as of 08:29, 4 January 2007
Installing VTK on a Windows System
Downloads Required
- CMake http://www.cmake.org/HTML/Download.html
- MinGW http://www.mingw.org/download.shtml
- WinCVS http://www.wincvs.org/download.html
Install CMake
Follow the wizard instructions of the downloaded installation file.
Install MinGW
Follow the wizard instructions of the downloaded installation file.
Install WinCVS
Follow the wizard instructions of the downloaded installation file.
Download VTK
Launch the installed WinCVS. To begin with, set the installation directory,
Admin -> Preferences
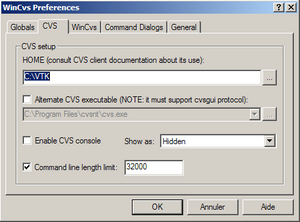 Type in the desired installation directory and click “OK”.
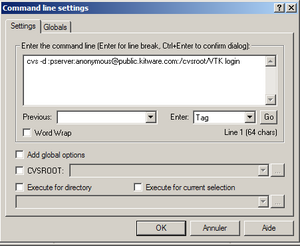
Next, we need to connect to the CVS repository.
Admin->Command Line
Type in “cvs -d :pserver:anonymous@public.kitware.com:/cvsroot/VTK” login and click “OK”, respond to the demand for a password with “vtk”. Finally, we need to download the CVS version of vtk.
Admin->Command Line
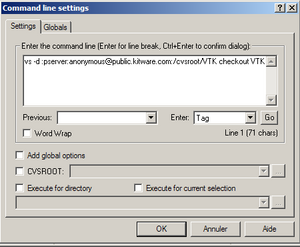 Type in “cvs -d :pserver:anonymous@public.kitware.com:/cvsroot/VTK checkout VTK” login and click “OK”.
Compiling
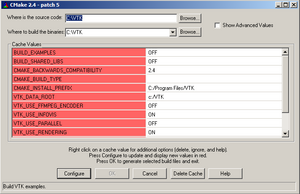
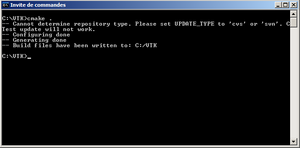
In a command window, type
cmakesetup .
cmake .
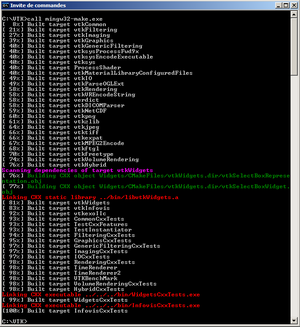
Lastly, you need to call the C++ compiler, as I used MinGW, the actual executable to call is mingw32-make.exe so I made a batch file to make it simpler 8)
make

