ParaView:Build And Install
Introduction
This page describes how to build and install ParaView. It covers both the release and the development version. Also, it covers both Unix type systems (Linux, HP-UX, Solaris), as well as Windows.
Pre-requisites
ParaView build process requires CMake and working compiler. On Unix like operating systems it also requires Make, while on Windows it requires Visual Studio (6, 7, or 7.1).
In order to run ParaView in parallel, MPI [1], [2] is also required.
Download And Install Cmake
CMake is a tool that makes cross platform building simple. On several systems it will probably be already installed. If it is not, please use the following instructions to install it.
Use Binaries
There are several precompiled binaries available at CMake download page. On Unix like operating systems, let say on Linux, download the appropriate version and follow these instructions:
cd $HOME
wget http://www.cmake.org/files/v2.0/cmake-2.0.6-x86-linux.tar.gz
mkdir software
cd software
tar xvfz ../cmake-2.0.6-x86-linux.tar.gz
ls
tar xvf cmake-2.0.6-x86-linux-files.tar
- Now you have directory $HOME/software/bin and inside there are executables cmake and ccmake.
- You can also install CMake in the /usr/local or /opt by untaring into different directory. The rest of instructions will assume it is in $HOME/software/bin.
Build Your Own CMake
On Unix like operating systemDownload the source code http://www.cmake.org/files/v2.0/cmake-2.0.6.tar.gz cd $HOME wget http://www.cmake.org/files/v2.0/cmake-2.0.6.tar.gz tar xvfz cmake-2.0.6.tar.gz mkdir cmake-2.0.6-bin cd cmake-2.0.6-bin ../cmake-2.0.6/bootstrap --prefix=$HOME/software make make install
|
On WindowsTo build CMake on windows, previous version of CMake is required. This can be downloaded from CMake download page. |
Build ParaView
Download And Build ParaView
If you are trying to build ParaView release, download it from the release page. For development version, please follow instructions for checking out from CVS.
Download the source code
You can always download the binaries from ParaView download page. This page contains binaries for several platforms and the source code for the releases.
Checkout From CVS
- Download from CVS:
mkdir $HOME/projects
cd $HOME/projects

cvs -d:pserver:anoncvs@www.paraview.org:/cvsroot/ParaView login
<enter>
cvs -d:pserver:anoncvs@www.paraview.org:/cvsroot/ParaView co ParaView
Configure ParaView With CMake
- Always use separate build directory. Do not build in the source directory
On Unix like system
mkdir $HOME/projects/ParaView-bin
cd $HOME/projects/ParaView-bin

$HOME/software/bin/ccmake $HOME/projects/ParaView
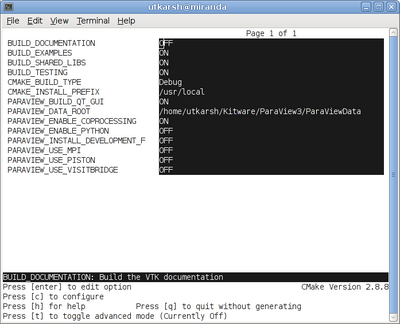
About CCMake (Curses CMake GUI)
|
On Windows
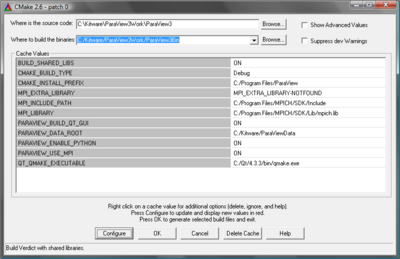
About CMakeSetup (Windows CMake GUI)
|
ParaView Settings
| Variable | Description |
| BUILD_SHARED_LIBS | If ON, use shared libraries. This way executables are smaller, but you have to make sure the shared libraries are on every system on the cluster. |
| VTK_USE_MPI | Turn this to ON to enable MPI. Other MPI options will not be availabel until you turn this on. |
| MPI_LIBRARY | Path to the MPI library (such as /usr/lib/libmpi.so). Should be found by default, but you may have to set it. |
| MPI_EXTRA_LIBRARY | Path to extra MPI library (such as /usr/lib/libmpi++.so). Again, should be found by default. |
| MPI_INCLUDE_PATH | Path to MPI includes (such as /usr/include/mpi). Again, should be found by default. |
Finish Configuring ParaView
- Once all configuration options are set, you should be able to just run <generate> (g key).
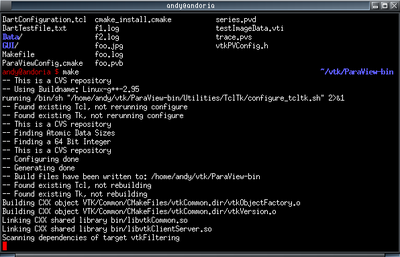
Build ParaView
Install ParaView
ParaView can be run directly from the build directory. That said, for production environments, it should be installed on some system location. On Windows, this locations is something like c:\Program Files, where as on Unix like operating systems it is /usr, /usr/local, /opt, or something similar.
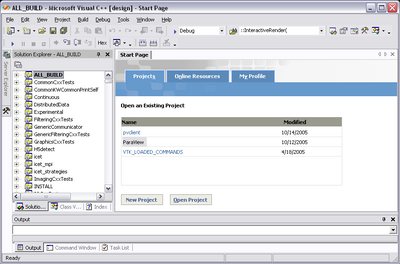
To install ParaView, simply run INSTALL target within the build system.


