Eclipse CDT4 Generator
Overview
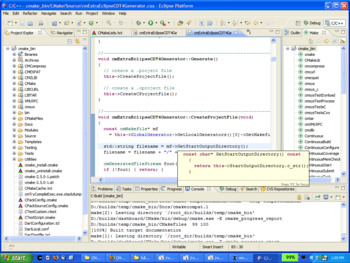
Starting with version 2.6.0 CMake includes a generator for Eclipse CDT 4.0 or newer. It works together with the Makefile generators (i.e. "Unix Makefiles", "MinGW Makefiles", "MSYS Makefiles", and maybe "NMake Makefiles"). This generator creates a set of .project/.cproject files that can be imported in Eclipse using File > Import > Existing Eclipse project.
Note that CMake 2.4.x users may follow instructions provided here CMake:Eclipse_UNIX_Tutorial in order to setup an Eclipse+CMake usage manually.
Using the Eclipse project generator
Using the Eclipse CDT project generator isn't different than using any other CMake generator. It works for in-source and out-of-source builds. In this example, we'll assume that the source tree of the project is /home/eric/certi_src.
Be sure to have a proper CMakeLists.txt file in the src directory. For instance, if you get an error such as Undefined Reference when you import into Eclipse, make sure you have the TARGET_LINK_LIBRARIES set correctly.
TARGET_LINK_LIBRARIES(AwesomeProjectMain ${ITK_LIBRARIES})
On Linux, these libraries may exist in the bin subdirectory under the ITK Root Directory with a ".a" extension. Create a build directory, go there and run CMake (see below for commandline). Make sure you set your CMAKE_BUILD_TYPE to Debug if you want to debug your project with gdb inside of Eclipse CDT. This is not done automatically (especially when using cmake-gui)
 mkdir /home/eric/certi_build
 cd /home/eric/certi_build
 cmake -G"Eclipse CDT4 - Unix Makefiles" -D CMAKE_BUILD_TYPE=Debug ../certi_src
(IMPORTANT) Your project name should be different from your executable name and different from your build folder name. Otherwise, Eclipse will NOT pick up your executable as you build them. Since my build folder name is certi_build, a CMakeLists.txt file like below should work (notice the difference in project name and executable name)
 PROJECT(AwesomeProject)
 ADD_EXECUTABLE(AwesomeProjectMain
   main.cpp
   util.h
   util.cpp
 )
You will now find two Eclipse files in your build tree:
 certi_build/.project
 certi_build/.cproject
Import the created project file into Eclipse
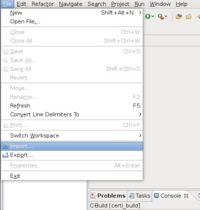
- Import project using Menu File->Import
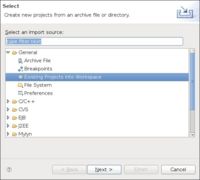
- Select General->Existing projects into workspace:
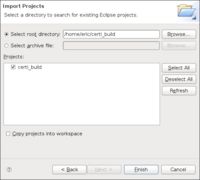
- Browse where your build tree is and select the root build tree directory. Keep "Copy projects into workspace" unchecked.
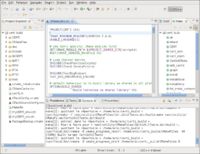
- You get a fully functional eclipse project
You can edit your CMakeLists.txt file inside of Eclipse CDT, a plugin called CMakeEd can help you with this task. When you edit your CMakeLists.txt file, you are recommended to delete your project and reimport it.
In-Source Builds
In-source builds are fully supported by the Eclipse project generator.
Out-Of-Source Builds
Eclipse has two issues with out-of-source builds, the project generator tries to work around them as best as it can. The details are described below.
Version Control Integration in Eclipse
Eclipse supports version control systems, e.g. cvs and svn, but for them to work, the project files must be at the root of the source tree. This is not the case with out-of-source builds. The only way to get version control for your project in Eclipse is to have a separate project in the source tree for this purpose. You can either create this project manually (screen cast showing how to do this: File:CMakeEclipseCDT4andCVS-2.ogg) or tell CMake to create it for you when creating your project files:
cmake -G"Eclipse CDT4 - Unix Makefiles" -DCMAKE_ECLIPSE_GENERATE_SOURCE_PROJECT=TRUE ../certi_src
Before CMake 2.8.7, you would use -DECLIPSE_CDT4_GENERATE_SOURCE_PROJECT=TRUE.
This will create your normal project in the build tree and additionally an extra project in the source tree, we call it the "source-project". In Eclipse you can then import this source-project the same way as you import the normal project. This way you'll have two (or more) projects, one for browsing the sources and doing version control, the other for building your project.
Accessing the Source and Advanced Editing Features
Eclipse has advanced support for editing C/C++ sources, including code navigation, autocompletion etc. For that to work the sources must be inside the project (the additional source-project from above is not inside the project). The Eclipse project generator therefore creates a linked resource to the source tree in the Eclipse project. This makes the C/C++ features work.
This linked resource isn't created if the build directory is a subdirectory of the source directory because Eclipse doesn't allow loading projects which have linked resources pointing to a parent directory. So we recommend to create your build directories not as children, but as siblings to the source directory. E.g.:
/path/to/source
/path/to/build
Discussion about limitations
If you would like to monitor the changes to the EclipseCDT4 support, you can view the following links which contain the git history log for changes to the two main files:
Eclipse assumes project files (i.e. .project and .cproject) must
be at the root of the project tree and a project
may be handled by a versioning system (CVS, SVN, ...) iff
the root project tree is.
This assumption clashes with the fact that CMake generated files should stay in the build tree whereas source files (which are usually those handled by a versioning system) reside in the source tree.
There has been a fair amount of discussion regarding this problem of the Eclipse CDT4 Generator:
- Trouble with CMake + Eclipse + SVN/CVS
- *Updated* Eclipse CDT4 CMake Generator - Pre-Alpha version
- Partially Shared project using Eclipse CDT (cdt-dev ML)
