SimpleITK/GettingStarted/Visual guide to building on Linux: Difference between revisions
No edit summary |
|||
| (37 intermediate revisions by 2 users not shown) | |||
| Line 1: | Line 1: | ||
This guide gives detailed instructions for building SimpleITK on Linux. It is written for beginners getting started with SimpleITK. | {{SimpleITKMigrationHeader}} | ||
[[Image: Simpleitk_logo.png|center]] | |||
This guide gives detailed instructions for building SimpleITK on Linux. It is written for beginners getting started with SimpleITK. There are examples of how to develop and execute simple programs in C Sharp and Lua. | |||
== Why Linux? == | == Why Linux? == | ||
| Line 31: | Line 34: | ||
* [http://www.vmware.com/ VMWare] | * [http://www.vmware.com/ VMWare] | ||
If you are a Mac OS X user, you can | If you are a Mac OS X user, you can also run Linux in a virtual machine. Two virtual machine environments for OS X are: | ||
* [http://www.parallels.com/products/desktop/ Parallels] | * [http://www.parallels.com/products/desktop/ Parallels] | ||
* [http://www.vmware.com/products/fusion/ VMWare Fusion] | * [http://www.vmware.com/products/fusion/ VMWare Fusion] | ||
| Line 44: | Line 47: | ||
== Step 2: Install build tools == | == Step 2: Install build tools == | ||
{| valign="top" | |||
The next step is to install the required build tools. | |- valign="top" | ||
| The next step is to install the required build tools. | |||
Open a terminal window (Application Menu > Terminal Emulator) and run the following command: | |||
Open a terminal window (Menu > Terminal) and run the following command: | |||
sudo apt-get install cmake cmake-curses-gui gcc g++ git | sudo apt-get install cmake cmake-curses-gui gcc g++ git | ||
Confirm that you want to install the packages (press "y"), then wait for the installation to complete. | Confirm that you want to install the packages (press "y"), then wait for the installation to complete. | ||
Alternatively, you could manually select each software package from the [http://www.nongnu.org/synaptic/ Synaptic Package Manager] (Application Menu > Settings > Synaptic Package Manager). | |||
Alternatively, you could manually select each software package from the | |||
By default building SimpleITK produces the SimpleITK C++ libraries and the SimpleITK Lua interpreter. It also supports bindings for other languages. To build this support, additional packages need to be installed. The following table shows the supported language bindings and the corresponding command to install the packages required for each language. | By default building SimpleITK produces the SimpleITK [http://en.wikipedia.org/wiki/C%2B%2B C++] libraries and the SimpleITK [http://en.wikipedia.org/wiki/Lua_(programming_language) Lua] interpreter. It also supports bindings for other languages. To build this support, additional packages need to be installed. The following table shows the supported language bindings and the corresponding command to install the additional packages required for each language. | ||
{| | {| border=1 | ||
|- | |- | ||
! Programming Language | ! Programming Language | ||
! Command to install the build tools | ! Command to install the build tools | ||
|- | |- | ||
| | | [http://en.wikipedia.org/wiki/C_Sharp_(programming_language) C#] | ||
| sudo apt-get install monodevelop | |||
| sudo apt-get install | |||
|- | |- | ||
| Java | | [http://en.wikipedia.org/wiki/Java_(programming_language) Java] | ||
| sudo apt-get install | | sudo apt-get install eclipse | ||
|- | |- | ||
| R | | [http://en.wikipedia.org/wiki/R_programming_language R] | ||
| sudo apt-get install | | sudo apt-get install r-base r-base-dev | ||
|- | |- | ||
| Ruby | | [http://en.wikipedia.org/wiki/Ruby_(programming_language) Ruby] | ||
| sudo apt-get install | | sudo apt-get install ruby | ||
|- | |- | ||
| Python | | [http://en.wikipedia.org/wiki/Python_(programming_language) Python] | ||
| sudo apt-get install | | sudo apt-get install python python-dev | ||
|- | |- | ||
| Tcl | | [http://en.wikipedia.org/wiki/Tcl Tcl] | ||
| sudo apt-get install | | sudo apt-get install tcl tcl-dev tk tk-dev | ||
|- | |- | ||
| All languages | | All languages | ||
| sudo apt-get install | | sudo apt-get install monodevelop eclipse r-base r-base-dev ruby python python-dev tcl tcl-dev tk tk-dev | ||
|} | |||
|[[File:SimpleITK_visual_guide_step02_01.png|200px|thumb|Install the build tools by opening the terminal]] | |||
[[File:SimpleITK_visual_guide_step02_02.png|200px|thumb|In the terminal, use apt-get to install the build tools]] | |||
[[File:SimpleITK_visual_guide_step02_03.png|200px|thumb|Build tools could also be installed using the software manager]] | |||
|} | |} | ||
== Step 3: Get SimpleITK source code == | == Step 3: Get SimpleITK source code == | ||
{| | |||
| | |||
The next step is to get the SimpleITK source code using git. | The next step is to get the SimpleITK source code using git. | ||
| Line 94: | Line 100: | ||
cd ~ | cd ~ | ||
Now download the SimpleITK source code, by entering the following command in the Terminal: | Now download the SimpleITK source code, by entering the following command in the Terminal: | ||
git clone --recursive http://itk.org/SimpleITK.git | git clone --recursive http://itk.org/SimpleITK.git | ||
| Line 100: | Line 105: | ||
Now change to the SimpleITK directory: | Now change to the SimpleITK directory: | ||
cd SimpleITK | cd SimpleITK | ||
| [[File:SimpleITK_visual_guide_step03_02.png|200px|thumb|Get the SimpleITK source code using <code>git</code>]] | |||
|} | |||
== Step 4: Build SimpleITK == | == Step 4: Build SimpleITK == | ||
The next step is to start building. | The next step is to start building. | ||
The recommended way to build is via the so-called "super build" | The recommended way to build is via the so-called "super build". The build directory should not be inside the source tree. I put the build directory in the same directory as the source tree. | ||
cd ~ | |||
mkdir SimpleITK-build | |||
cd SimpleITK-build | |||
cmake ../SimpleITK/SuperBuild | |||
cmake ../SuperBuild | |||
The SuperBuild generates make files which takes care of downloading and building ITK, SWIG, and Lua, as well as SimpleITK | The SuperBuild generates make files which takes care of downloading and building ITK, SWIG, and Lua, as well as SimpleITK. | ||
To start the (long) build process, type: | To start the (long) build process, type: | ||
make | make | ||
On my | On my test system, a 4 core virtual machine with 16 GB of RAM, the build took just over an hour. | ||
After the build is finished, you need to add SimpleITK to your <code>LD_LIBRARY_PATH</code>: | After the build is finished, you need to add SimpleITK to your <code>LD_LIBRARY_PATH</code>: | ||
export LD_LIBRARY_PATH=$LD_LIBRARY_PATH:~ | export LD_LIBRARY_PATH=$LD_LIBRARY_PATH:~/SimpleITK-build/lib | ||
You can now (optionally) check whether the build was successful: | You can now (optionally) check whether the build was successful: | ||
cd SimpleITK-build | cd ~/SimpleITK-build | ||
ctest | ctest | ||
| Line 133: | Line 135: | ||
== Step 5: Use SimpleITK == | == Step 5: Use SimpleITK == | ||
SimpleITK is available to a variety of languages. In this section we give simple example programs demonstrating the SimpleITK API in C Sharp and Lua. | |||
[[File: | === A simple C# program === | ||
Select File > New > Solution. | {| | ||
|- valign="top" | |||
Select C# > Console Project. Enter a suitable name e.g. " | | This sub-section will describe how to create a simple C# application using SimpleITK from MonoDevelop. | ||
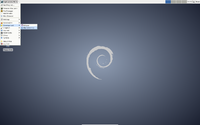
To start launch the C# development environment, MonoDevelop (Application Menu > Development > MonoDevelop). | |||
[[File: | | [[File:SimpleITK_visual_guide_step05_CSharp_01.png|200px|thumb|Open MonoDevelop]] | ||
In the Solution explorer, right-click "Selection" and select "Edit References...". | |- | ||
| Then create our new Solution (Select File > New > Solution). | |||
[[File: | |- | ||
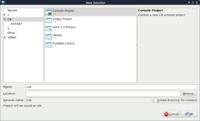
Select the ".Net Assembly" tab, navigate to "~ | |Select a C# console project (C# > Console Project). Enter a suitable name e.g. "sitk" and uncheck "Create directory for directory". Select "Forward" and then "OK". | ||
mkdir ~/ | | [[File:SimpleITK_visual_guide_step05_CSharp_02.png|200px|thumb|Create Console Project]] | ||
mkdir ~/ | |- | ||
cp ~ | | In the Solution explorer, right-click "Selection" and select "Edit References...". | ||
cp ~ | | [[File:SimpleITK_visual_guide_step05_CSharp_03.png|200px|thumb|Edit References]] | ||
|- | |||
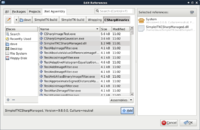
| Select the ".Net Assembly" tab, navigate to "~/SimpleITK-build/SimpleITK-build/Wrapping/CSharpBinaries", select "SimpleITKCSharpManaged.dll", click "Add", and then close the window by selecting "OK". This will copy "SimpleITKCSharpManaged.dll" to your build directory e.g. "bin/Debug" or "bin/Release". | |||
| [[File:SimpleITK_visual_guide_step05_CSharp_04.png|200px|thumb|Add SimpleITKCSharpManaged.dll]] | |||
|- | |||
| You must also '''manually copy''' "libSimpleITKCSharpNative.so" to your build directories: | |||
mkdir ~/sitk/bin/Debug | |||
mkdir ~/sitk/bin/Release | |||
cp ~/SimpleITK-build/SimpleITK-build/Wrapping/CSharpBinaries/libSimpleITKCSharpNative.so ~/sitk/bin/Debug | |||
cp ~/SimpleITK-build/SimpleITK-build/Wrapping/CSharpBinaries/libSimpleITKCSharpNative.so ~/sitk/bin/Release | |||
SimpleITK has now been added as a project reference. | SimpleITK has now been added as a project reference. | ||
|- | |||
| The following short program creates an image of a Gaussian blob, generates a derivative image from the Gaussian, scales and windows the derivative's intensities, converts the result to 8-bit unsigned ints, and writes out a PNG file: | |||
using System; | using System; | ||
using | using sitk = itk.simple.SimpleITK; | ||
namespace itk.simple | |||
{ | |||
class MainClass | |||
{ | |||
public static void Main (string[] args) | |||
{ | |||
var size = new VectorUInt32 (new uint[] { 128, 128 }); | |||
var sigma = new VectorDouble (new Double[] { 32.0, 32.0 }); | |||
var center = new VectorDouble (new Double[] { 64.0, 64.0 }); | |||
var gauss = sitk.GaussianSource (PixelIDValueEnum.sitkFloat32, size, sigma, center); | |||
var deriv = sitk.Cast (128.0 + 24.0 * sitk.Derivative (gauss), PixelIDValueEnum.sitkUInt8); | |||
sitk.WriteImage (deriv, "gauss-deriv-test.png"); | |||
} | } | ||
} | } | ||
} | } | ||
| [[File:SimpleITK_visual_guide_step05_CSharp_05.png|200px|thumb|A simple C# program]] | |||
|- | |||
| Note that in the example, the derivative image's intensities are scaled mathematically to illustrate SimpleITK's overloading of the mathematically operators. The image intensities could also be scaled using SimpleITK's RescaleIntesity function. | |||
To build the project press "F8" or select Build > Build All from the menu. | To build the project press "F8" or select Build > Build All from the menu. | ||
| Line 181: | Line 195: | ||
To debug the project, add a breakpoint at a desired location and press "F5". | To debug the project, add a breakpoint at a desired location and press "F5". | ||
The Gaussian Derivative image to the right shows the results of the C# example program. | |||
| [[File:SimpleITK_visual_guide_step05_CSharp_06.png|200px|thumb|Gaussian Derivative image]] | |||
|} | |||
=== Using Lua === | === Using Lua === | ||
[http://www.lua.org/about.html Lua] is a fast, portable, lightweight scripting language that is included with the SimpleITK source code. Because the entire source code for Lua is less than 600kb, it takes very little space relative to large projects such as SimpleITK. That makes Lua very popular as an embedded scripting language. | |||
In this SimpleITK/Lua example we show how to use a text editor to produce a SimpleITK example in Lua and execute the program. | |||
[[File:SimpleITK_visual_guide_step05_Lua01.png|200px|thumb|Open Mousepad]] | |||
By default, Debian with the Xfce user interface, comes with '''Mousepad''' (Application Menu > Accessories > Mousepad), a simple text editor. Other possible editors include '''gedit''' with Gnome or '''kedit''' with KDE. | |||
[[File:SimpleITK_visual_guide_step05_Lua_02.png|200px|thumb|Simple Lua Program]] | |||
The following is a simple Lua example similar to the C# example in the previous section. This program creates an image of a Gaussian blob, computes a derivative image of the Gaussian, rescales the floating point image to 0-255, casts it to a unsigned char image, and writes the result to a PNG file. | |||
local sitk = {} | |||
sitk = SimpleITK | |||
size = sitk.VectorUInt32(); | |||
size:push_back(128); | |||
size:push_back(128); | |||
sigma = sitk.VectorDouble(); | |||
sigma:push_back(32.0); | |||
sigma:push_back(32.0); | |||
center = sitk.VectorDouble(); | |||
center:push_back(64.0); | |||
center:push_back(64.0); | |||
gauss = sitk.GaussianSource (sitk.sitkFloat32, size, sigma, center); | |||
deriv = sitk.Derivative(gauss); | |||
result = sitk.RescaleIntensity(deriv, 0, 255.0) | |||
result = sitk.Cast(result, sitk.sitkUInt8) | |||
sitk.WriteImage(result, "sitk-lua-test.png"); | |||
The script is slightly different than the C# example in that the RescaleIntensity filter is used. In C# mathematical operators are overloaded for SimpleITK images. This is not the case for Lua, so mathematical operations on SimpleITK images are a bit more complicated. Therefore I chose to use a built in filter. | |||
To try out the program, copy the code and paste it into Mousepad. Then Save it as "DerivativeExample.lua" and enter the following command in a Terminal window. | |||
~/SimpleITK-build/SimpleITK-build/bin/SimpleITKLua DerivativeExample.lua | |||
[[File:SimpleITK_visual_guide_step05_lua_03.png|200px|thumb|Lua Derivative image]] | |||
The Lua Derivative image on the right shows the output of the our SimpleITK Lua example. The result is similar to, although not the same as the C Sharp produced image. They are different because the image intensities are not scaled in the same manner. | |||
Latest revision as of 18:17, 13 December 2019
| NOTICE |
| This page is being migrated to Read The Docs!
For the up to date version please see this page! |
This guide gives detailed instructions for building SimpleITK on Linux. It is written for beginners getting started with SimpleITK. There are examples of how to develop and execute simple programs in C Sharp and Lua.
Why Linux?
- Linux is freely available
- It has all the required tools
- Did I mention it's free?
Step 1: Get Linux
The first step is to install a Linux distribution. Some popular ones are:
And here is a comparison of those distributions.
There are many online tutorials explaining how to install your chosen Linux distribution:
- Ubuntu
- Mint
- Debian
If you are a Windows user, you may consider running Linux on a virtual machine. Some popular virtual machine environments are:
If you are a Mac OS X user, you can also run Linux in a virtual machine. Two virtual machine environments for OS X are:
Again, there are heaps of tutorials:
- Installing Ubuntu inside Windows using VirtualBox
- How to Install Ubuntu on VirtualBox
- Install Mint 16 on VirtualBox
- How to Install Linux Mint in Virtualbox (youtube)
This guide uses Debian 7, but the steps are very similar for other Linux distributions.
Step 2: Install build tools
| The next step is to install the required build tools.
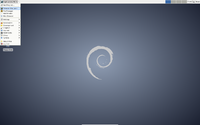
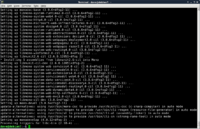
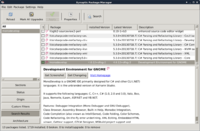
Open a terminal window (Application Menu > Terminal Emulator) and run the following command: sudo apt-get install cmake cmake-curses-gui gcc g++ git Confirm that you want to install the packages (press "y"), then wait for the installation to complete. Alternatively, you could manually select each software package from the Synaptic Package Manager (Application Menu > Settings > Synaptic Package Manager). By default building SimpleITK produces the SimpleITK C++ libraries and the SimpleITK Lua interpreter. It also supports bindings for other languages. To build this support, additional packages need to be installed. The following table shows the supported language bindings and the corresponding command to install the additional packages required for each language.
|
Step 3: Get SimpleITK source code
|
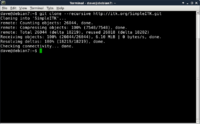
The next step is to get the SimpleITK source code using git. Decide where you want to put the source code. I'm putting mine in my home directory: cd ~ Now download the SimpleITK source code, by entering the following command in the Terminal: git clone --recursive http://itk.org/SimpleITK.git Now change to the SimpleITK directory: cd SimpleITK |
Step 4: Build SimpleITK
The next step is to start building.
The recommended way to build is via the so-called "super build". The build directory should not be inside the source tree. I put the build directory in the same directory as the source tree.
cd ~
mkdir SimpleITK-build
cd SimpleITK-build
cmake ../SimpleITK/SuperBuild
The SuperBuild generates make files which takes care of downloading and building ITK, SWIG, and Lua, as well as SimpleITK.
To start the (long) build process, type:
make
On my test system, a 4 core virtual machine with 16 GB of RAM, the build took just over an hour.
After the build is finished, you need to add SimpleITK to your LD_LIBRARY_PATH:
export LD_LIBRARY_PATH=$LD_LIBRARY_PATH:~/SimpleITK-build/lib
You can now (optionally) check whether the build was successful:
cd ~/SimpleITK-build
ctest
All (or at least most) of the tests should pass.
Step 5: Use SimpleITK
SimpleITK is available to a variety of languages. In this section we give simple example programs demonstrating the SimpleITK API in C Sharp and Lua.
A simple C# program
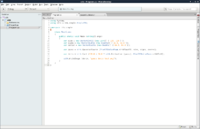
| This sub-section will describe how to create a simple C# application using SimpleITK from MonoDevelop.
To start launch the C# development environment, MonoDevelop (Application Menu > Development > MonoDevelop). |
|
| Then create our new Solution (Select File > New > Solution). | |
| Select a C# console project (C# > Console Project). Enter a suitable name e.g. "sitk" and uncheck "Create directory for directory". Select "Forward" and then "OK". | |
| In the Solution explorer, right-click "Selection" and select "Edit References...". | |
| Select the ".Net Assembly" tab, navigate to "~/SimpleITK-build/SimpleITK-build/Wrapping/CSharpBinaries", select "SimpleITKCSharpManaged.dll", click "Add", and then close the window by selecting "OK". This will copy "SimpleITKCSharpManaged.dll" to your build directory e.g. "bin/Debug" or "bin/Release". | |
You must also manually copy "libSimpleITKCSharpNative.so" to your build directories:
mkdir ~/sitk/bin/Debug
mkdir ~/sitk/bin/Release
cp ~/SimpleITK-build/SimpleITK-build/Wrapping/CSharpBinaries/libSimpleITKCSharpNative.so ~/sitk/bin/Debug
cp ~/SimpleITK-build/SimpleITK-build/Wrapping/CSharpBinaries/libSimpleITKCSharpNative.so ~/sitk/bin/Release
SimpleITK has now been added as a project reference. | |
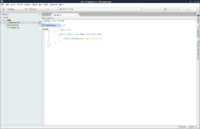
The following short program creates an image of a Gaussian blob, generates a derivative image from the Gaussian, scales and windows the derivative's intensities, converts the result to 8-bit unsigned ints, and writes out a PNG file:
using System;
using sitk = itk.simple.SimpleITK;

namespace itk.simple
{
    class MainClass
    {
        public static void Main (string[] args)
        {
            var size = new VectorUInt32 (new uint[] { 128, 128 });
            var sigma = new VectorDouble (new Double[] { 32.0, 32.0 });
            var center = new VectorDouble (new Double[] { 64.0, 64.0 });

            var gauss = sitk.GaussianSource (PixelIDValueEnum.sitkFloat32, size, sigma, center);

            var deriv = sitk.Cast (128.0 + 24.0 * sitk.Derivative (gauss), PixelIDValueEnum.sitkUInt8);

            sitk.WriteImage (deriv, "gauss-deriv-test.png");
        }
    }
}
|
|
| Note that in the example, the derivative image's intensities are scaled mathematically to illustrate SimpleITK's overloading of the mathematically operators. The image intensities could also be scaled using SimpleITK's RescaleIntesity function.
To build the project press "F8" or select Build > Build All from the menu. To debug the project, add a breakpoint at a desired location and press "F5". The Gaussian Derivative image to the right shows the results of the C# example program. |
Using Lua
Lua is a fast, portable, lightweight scripting language that is included with the SimpleITK source code. Because the entire source code for Lua is less than 600kb, it takes very little space relative to large projects such as SimpleITK. That makes Lua very popular as an embedded scripting language.
In this SimpleITK/Lua example we show how to use a text editor to produce a SimpleITK example in Lua and execute the program.
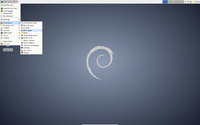
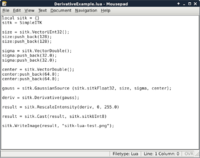
By default, Debian with the Xfce user interface, comes with Mousepad (Application Menu > Accessories > Mousepad), a simple text editor. Other possible editors include gedit with Gnome or kedit with KDE.
The following is a simple Lua example similar to the C# example in the previous section. This program creates an image of a Gaussian blob, computes a derivative image of the Gaussian, rescales the floating point image to 0-255, casts it to a unsigned char image, and writes the result to a PNG file.
local sitk = {}
sitk = SimpleITK

size = sitk.VectorUInt32();
size:push_back(128);
size:push_back(128);

sigma = sitk.VectorDouble();
sigma:push_back(32.0);
sigma:push_back(32.0);

center = sitk.VectorDouble();
center:push_back(64.0);
center:push_back(64.0);

gauss = sitk.GaussianSource (sitk.sitkFloat32, size, sigma, center);

deriv = sitk.Derivative(gauss);

result = sitk.RescaleIntensity(deriv, 0, 255.0)

result = sitk.Cast(result, sitk.sitkUInt8)

sitk.WriteImage(result, "sitk-lua-test.png");
The script is slightly different than the C# example in that the RescaleIntensity filter is used. In C# mathematical operators are overloaded for SimpleITK images. This is not the case for Lua, so mathematical operations on SimpleITK images are a bit more complicated. Therefore I chose to use a built in filter.
To try out the program, copy the code and paste it into Mousepad. Then Save it as "DerivativeExample.lua" and enter the following command in a Terminal window.
~/SimpleITK-build/SimpleITK-build/bin/SimpleITKLua DerivativeExample.lua
The Lua Derivative image on the right shows the output of the our SimpleITK Lua example. The result is similar to, although not the same as the C Sharp produced image. They are different because the image intensities are not scaled in the same manner.
